
Jun
How To Grow Marijuana Seeds
Causes and Solutions for Yellow Cannabis Leaves
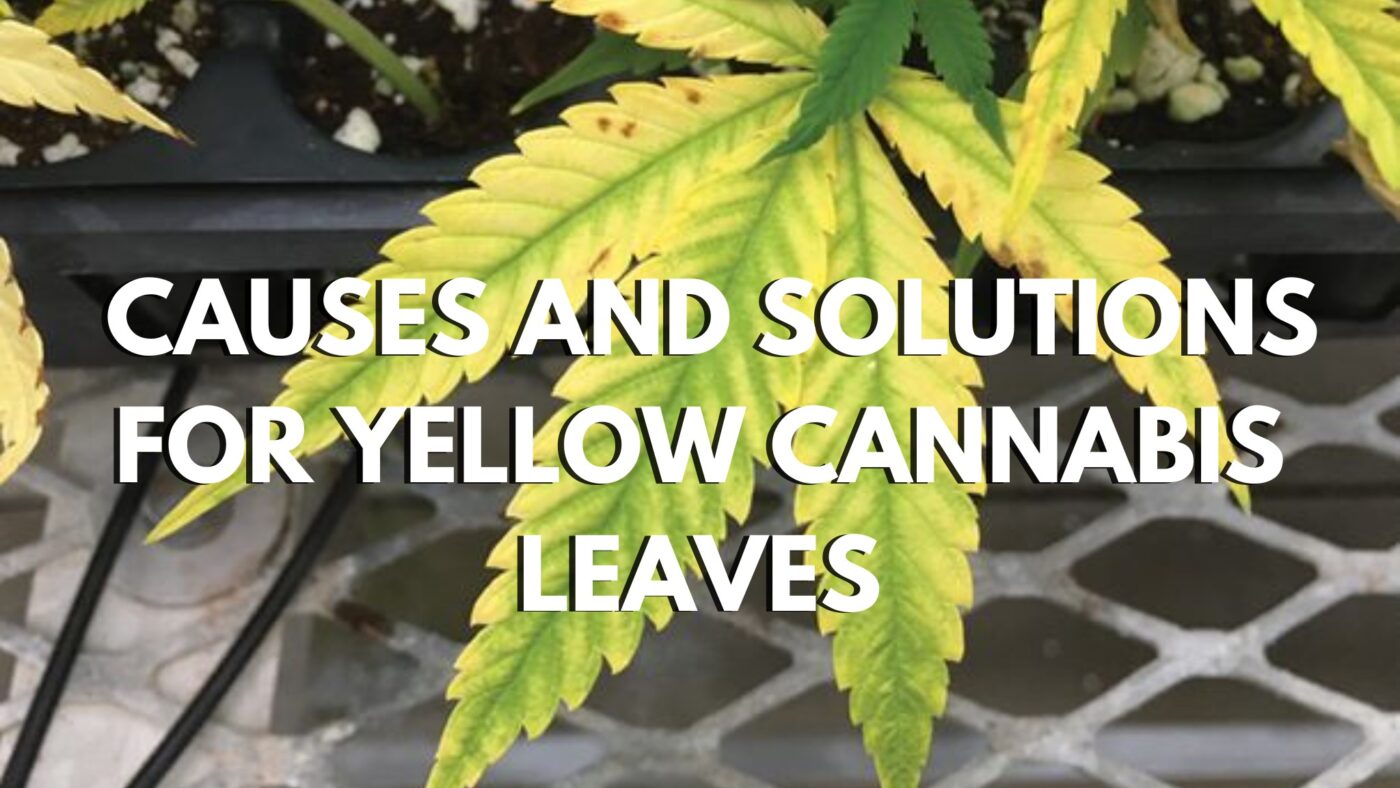
What Causes and Solutions for Yellow Cannabis Leaves? It’s wise to go through this cannabis blog even if you don’t think you need it, better safe than scrambling when things fall apart in your grow room. Problems can pop up in any marijuana garden, and even seasoned growers aren’t immune. Yellowing leaves are often the earliest clue that something’s off.
Have you ever stepped into your grow room or garden and noticed your cannabis plant’s once-vibrant green leaves turning a dull, troubling yellow? It’s a moment that can send a wave of stress through any grower, whether you’re just starting out or have years of experience under your belt. Yellowing leaves are far more than just a cosmetic concern; they’re often one of the first signs that your plant is struggling. This discoloration is the plant’s way of signaling that something isn’t right, and if left unchecked, it can quickly escalate into a more serious issue that threatens your entire crop. From nutrient deficiencies and pH imbalances to improper watering, pests, and light stress, there are a variety of factors that can cause leaves to turn yellow. Recognizing these early warning signs and understanding what they mean is critical to maintaining a healthy cannabis garden.
The good news is that yellow leaves don’t have to spell disaster. With the right knowledge and quick action, many issues that cause yellowing can be corrected and in some cases, even reversed. Whether you’re growing indoors or outdoors, in soil or hydroponics, learning how to diagnose and treat the root causes of yellow leaves will dramatically improve your success as a grower. In this article, we’ll break down everything you need to know to identify the problem, apply effective solutions, and prevent future issues. From pinpointing specific nutrient problems to adjusting your environmental conditions, this guide will equip you with the tools and confidence to keep your plants healthy and thriving. Let’s dig in and turn those yellow leaves back to green.
Understanding Leaf Discoloration
Leaf discoloration in cannabis plants is one of the most telling indicators that something isn’t quite right with your grow. While healthy cannabis leaves should be a rich, vibrant green, any shift in color especially toward yellow is a clear sign that your plant is under stress. This discoloration can occur for a variety of reasons, and the key to addressing it effectively is understanding what the plant is trying to communicate. Yellowing may start at the tips, edges, or between the veins of the leaves, and the pattern of discoloration can provide valuable clues. For instance, yellowing at the bottom of the plant often points to a nitrogen deficiency, while yellowing at the top can indicate issues like light burn or iron deficiency. Recognizing these visual cues is crucial in diagnosing the root of the problem.
Discoloration doesn’t always mean disaster, but it should never be ignored. Environmental stressors such as improper lighting, fluctuating temperatures, overwatering, or poor drainage can all affect the plant’s ability to absorb nutrients, leading to yellowing. Similarly, imbalanced pH levels in the soil or water can lock out essential nutrients, even if they’re present in sufficient quantities. By paying close attention to where and how the discoloration appears, and combining that with knowledge of your growing conditions, you can take targeted action to restore plant health. Addressing the issue promptly not only helps revive affected plants but also prevents the problem from spreading or worsening, ensuring your cannabis crop stays on track.
Yellow cannabis leaves are a clear sign that something is stressing your plant, and figuring out the cause quickly is key to preventing further damage. Below is a detailed list of the most common reasons leaves turn yellow, along with how to identify each issue.
Common Causes of Yellow Cannabis Leaves
Nutrient Deficiencies
Lack of essential nutrients can lead to various patterns of yellowing:
- Nitrogen Deficiency
- Symptoms: Lower (older) leaves turn pale yellow, then brown and fall off.
- Common in the vegetative stage if not enough nutrients are provided.
- Magnesium Deficiency
- Symptoms: Yellowing between veins (interveinal chlorosis), often starting in the middle of the plant.
- Leaves may curl or develop rust-colored spots.
- Iron Deficiency
- Symptoms: New growth turns yellow, but veins remain green.
- Often caused by pH imbalance rather than true lack of iron.
- Potassium Deficiency
- Symptoms: Yellowing at leaf edges and tips with burnt or crispy margins.
- Can appear during flowering if potassium levels drop.
- Calcium or Sulfur Deficiency
- Symptoms: Deformed new growth, yellow patches, or spotting.
- Rare, but more common in hydroponic systems.
pH Imbalance
Even if nutrient levels are correct, the wrong pH can prevent absorption:
- Soil pH Range: 6.0 – 7.0
- Hydroponics pH Range: 5.5 – 6.5
- Symptoms: General yellowing, slow growth, and signs of multiple deficiencies.
- Fix: Test and adjust pH of water and nutrient solution regularly.
Overwatering or Underwatering
Watering issues are one of the most common beginner mistakes:
- Overwatering
- Symptoms: Leaves yellow, droop, and feel swollen or heavy.
- Can lead to root rot and oxygen deprivation.
- Underwatering
- Symptoms: Leaves turn yellow, wilt, dry out, and curl upward.
- Soil appears dry and cracked.
Light Stress
Light levels that are too high or too low can cause yellowing:
- Too Much Light (Light Burn)
- Symptoms: Leaves near lights turn pale, bleached, or scorched.
- Tips may curl or crisp.
- Too Little Light
- Symptoms: Lower leaves yellow and drop due to lack of energy.
- Common in plants crowded or not getting full coverage.
Pests and Diseases
Insects and pathogens can damage leaves directly or stress the plant:
- Spider Mites, Aphids, Fungus Gnats
- Symptoms: Tiny yellow dots, webbing, leaf curling, or stunted growth.
- Look on the underside of leaves or in soil.
- Fungal Diseases (e.g., root rot, powdery mildew)
- Symptoms: Yellowing paired with wilting, mushy stems, or white powder.
- Often caused by poor airflow or high humidity.
Environmental Stress
Poor environmental conditions can also lead to leaf yellowing:
- Extreme Temperatures
- Heat Stress: Leaves curl up and turn yellow or brown.
- Cold Stress: Slowed growth, yellowing, and drooping.
- Low Humidity
- Causes excess transpiration and leaf stress, especially in young plants.
- Poor Air Circulation
- Stale air promotes mold, pests, and weak growth.
Summary
To properly diagnose and fix yellowing cannabis leaves:
- Observe where the yellowing starts (top, middle, or bottom of the plant).
- Check patterns (between veins, leaf tips, whole leaf).
- Review recent changes in environment, feeding, or watering.
- Test your pH and nutrient levels if unsure.
Diagnosing Yellow Cannabis Leaves
When your cannabis leaves start turning yellow, it’s a clear sign your plant is under stress but identifying why can feel overwhelming. The good news is that the location, pattern, and progression of the yellowing offer valuable clues. By carefully observing these signs, you can narrow down the possible causes and take action before the problem worsens.
Step 1: Identify Where the Yellowing Occurs
Bottom Leaves Turning Yellow First
- Often points to mobile nutrient deficiencies (like nitrogen, potassium, or magnesium), where the plant pulls nutrients from older leaves to support new growth.
- May also indicate overwatering, underwatering, or natural aging in late flowering.
Top Leaves Turning Yellow First
- Usually linked to immobile nutrient deficiencies, such as iron, calcium, or sulfur. These nutrients can’t move easily, so newer leaves show symptoms first.
- Can also suggest light burn if leaves near the grow lights are affected.
Middle Leaves Yellowing
- Can signal magnesium deficiency, pH issues, or sometimes heat stress from poor air circulation.
Step 2: Examine the Pattern of Yellowing
Entire Leaf Fades to Yellow
- Often due to nitrogen deficiency, underwatering, or old age of the leaf.
- If leaves yellow evenly and drop off cleanly, it may be natural senescence during flowering.
Yellowing Between Veins (Interveinal Chlorosis)
- Usually indicates magnesium or iron deficiency. The veins remain green while the tissue between them fades.
Yellowing Edges or Tips
- May point to potassium deficiency, light burn, or nutrient burn (if tips are brown and crispy).
- Look for dry, brittle texture along the margins.
Spots, Patches, or Blotches
- Could suggest pests, fungal disease, or calcium deficiency.
- Irregular yellowing often needs closer inspection of the leaf’s surface or underside.
Step 3: Consider Recent Changes or Conditions
Ask yourself:
- Have I changed nutrient brands or feeding schedules recently?
- Has the pH of my water or medium been tested lately?
- Are the pots drying out too quickly or staying wet too long?
- Has the light intensity increased or changed?
- Are temperatures or humidity levels within a healthy range?
Environmental stress and grow room changes are often the trigger for sudden yellowing.
Step 4: Test pH and Nutrient Levels
- Use a soil pH meter or pH strips to confirm your root zone is in the optimal range:
- Soil: 6.0 – 7.0
- Hydroponics/Coco: 5.5 – 6.5
- Consider running a runoff test to check the pH and EC (electrical conductivity) of the water leaving your container.
- High EC = nutrient buildup (possible lockout)
- Low EC = not enough nutrients present
Step 5: Rule Out Pests and Disease
- Check the underside of leaves for mites, aphids, or eggs.
- Look for webbing, tiny bite marks, or spots that worsen quickly.
- Inspect roots (if possible) for signs of rot, like foul smells or dark, mushy tissue.
Effective Solutions for Yellow Leaves
Yellow cannabis leaves can be concerning, but with a systematic approach, you can often reverse the issue and bring your plants back to full health. The key is to identify the underlying cause and apply targeted solutions rather than trying random fixes. Here’s a comprehensive guide to resolving yellowing leaves based on the most common causes.
Correct Nutrient Deficiencies
Solution: Feed Appropriately Based on the Deficiency Identified
- Nitrogen Deficiency
- Use a balanced fertilizer with higher nitrogen (N) levels, especially in the vegetative stage.
- Choose organic options like fish emulsion, compost tea, or blood meal if you prefer natural inputs.
- Magnesium or Calcium Deficiency
- Add Cal-Mag supplements or Epsom salts (1 tsp/gallon of water for magnesium).
- Ensure your pH is in the correct range so the plant can absorb these nutrients.
- Iron Deficiency
- Apply a chelated iron foliar spray to provide quick relief.
- Check and adjust pH to the proper level to restore nutrient uptake.
- General Tip: Don’t overfeed in a panic too many nutrients can cause toxic buildup. Start with half-strength doses and monitor the plant’s response.
Improve Watering Practices
Solution: Establish a Consistent and Balanced Watering Routine
- If Overwatering
- Allow the soil to dry out completely before the next watering.
- Improve drainage with perlite or by switching to fabric pots.
- Avoid watering on a scheduled water based on the weight of the pot and soil moisture.
- If Underwatering
- Water slowly and deeply to rehydrate the entire root zone.
- Monitor soil moisture regularly with your finger or a moisture meter.
- Increase frequency slightly if the soil dries out too quickly.
Fix pH Imbalances
Solution: Test and Adjust the pH of Your Water and Growing Medium
- Test both your water and soil runoff with a pH meter or strips.
- Soil Ideal pH: 6.0–7.0
- Hydroponics/Coco Ideal pH: 5.5–6.5
- Use pH up/down solutions to bring your water within range.
- Flush with properly pH-balanced water if nutrient lockout is suspected.
Adjust Light and Environmental Conditions
Solution: Optimize Lighting and Climate Settings
- If Too Much Light
- Raise grow lights or dim them to reduce intensity.
- Ensure lights are appropriate for the stage (e.g., less intensity during early veg).
- Watch for signs of bleaching or heat stress on upper leaves.
- If Too Little Light
- Add supplemental lighting or reposition plants to receive more coverage.
- Prune lower leaves and branches to focus energy on top growth.
- Environmental Fixes:
- Temperature: Keep between 70–85°F (20–29°C).
- Humidity: 40–70% depending on the stage of growth.
- Improve air circulation with fans to prevent mold and heat pockets.
Eliminate Pests and Disease
Solution: Identify and Treat Pest or Fungal Problems Quickly
- Inspect plants closely for mites, aphids, fungus gnats, or whiteflies.
- Use natural insecticides (like neem oil or insecticidal soap) or introduce beneficial insects (like ladybugs or predatory mites).
- For fungal issues (like root rot or mildew), improve airflow and reduce humidity.
- In extreme cases, remove affected leaves or consider transplanting into clean, fresh soil.
Flush the Growing Medium (If Needed)
Solution: Perform a Controlled Flush to Remove Nutrient Build-Up
- Use 2–3 times the pot volume in pH-balanced water to flush excess salts and nutrients from the soil.
- After flushing, allow the plant to dry slightly and then resume feeding with a mild nutrient solution.
Prevention Tips for Long-Term Plant Health
- Keep a grow journal to track feeding, watering, and environmental changes.
- Regularly check your equipment (lights, timers, meters) to ensure consistency.
- Observe your plants daily, early signs are much easier to fix than late-stage problems.
- Use high-quality nutrients and test water sources for contaminants.
Fixing yellow cannabis leaves isn’t about a quick fix, it’s about reading the signals your plant is sending and responding with the right care. With patience, observation, and the solutions above, you can restore your plants to vibrant green health and get your grow back on track.
Prevention Tips for Healthy Green Cannabis Leaves
Keeping your cannabis leaves vibrant and green isn’t just about fixing problems when they arise, it’s about building a solid foundation for plant health from the very beginning. Prevention is the best strategy when it comes to avoiding yellowing and other stress-related issues. Here’s a complete guide to help you keep your cannabis plants thriving, strong, and stress-free.
Maintain a Balanced Nutrient Regimen
- Feed based on growth stage:
- Vegetative phase: Higher nitrogen (N) to support leafy growth.
- Flowering phase: Increase phosphorus (P) and potassium (K) while reducing nitrogen.
- Avoid overfeeding: Nutrient burn can cause yellow or brown leaf tips. Start low and increase gradually.
- Use complete nutrient systems: Include secondary nutrients (calcium, magnesium, sulfur) and trace minerals (iron, zinc, manganese) for full-spectrum health.
Water Smart and Consistently
- Follow the “lift test”: Water when pots feel light and the top inch or two of soil is dry.
- Avoid waterlogging: Use well-draining soil and containers with proper drainage holes.
- Use clean, pH-balanced water: Avoid tap water high in chlorine or salts unless filtered.
Monitor and Maintain Proper pH
- Keep pH in range:
- Soil: 6.0–7.0
- Hydroponics/Coco: 5.5–6.5
- Check runoff regularly: pH outside the ideal range leads to nutrient lockout, even when nutrients are present.
- Adjust as needed: Use pH up/down solutions or natural buffers like dolomite lime for soil.
Provide Proper Lighting
- Use high-quality grow lights: Choose full-spectrum LEDs or HPS/CMH based on grow space and budget.
- Adjust light distance: Keep lights close enough for growth, but far enough to prevent heat stress and bleaching.
- Mimic natural light cycles:
- Veg phase: 18–24 hours of light
- Flowering: 12 hours of uninterrupted darkness
Optimize the Environment
- Temperature:
- Day: 70–85°F (20–29°C)
- Night: no more than 10–15°F drop
- Humidity levels:
- Seedlings: 65–70%
- Veg: 50–70%
- Flower: 40–50%
- Good airflow: Use oscillating fans and exhaust systems to prevent hot spots, mold, and pests.
Regularly Inspect for Pests and Disease
- Check leaf undersides: Look for mites, aphids, and eggs.
- Prevent infestations:
- Use sticky traps, neem oil sprays, or beneficial insects.
- Keep the grow space clean and free of standing water or decaying plant matter.
Use Quality Soil and Growing Mediums
- Choose well-aerated, nutrient-rich soil: Look for organic mixes or amend with compost, worm castings, and perlite.
- Coco coir for hydroponics: Maintain consistent feeding and pH checks, as these mediums don’t hold nutrients like soil.
Stay Consistent and Observant
- Monitor daily: Catch changes early before they become problems.
- Keep a grow journal: Track watering, feeding, environmental conditions, and plant changes.
- Be patient and responsive: Don’t overcorrect too quickly and observe how the plant responds to each change.
Healthy green leaves are the result of proactive care, not just reactive fixes. By maintaining ideal growing conditions, feeding properly, and observing your plants regularly, you’ll prevent most issues before they start and enjoy vigorous, high-yielding cannabis plants throughout your grow cycle.
Yellow Cannabis Leaves: A Signal, Not the End
Yellowing cannabis leaves can be an alarming sight, especially for new growers. It may look like a sign that something is seriously wrong, but in reality, yellow leaves are often just a signal that your plant needs attention. While it can be frustrating, spotting yellow leaves early gives you a powerful opportunity to diagnose and correct the issue before it turns into a major problem. With a little knowledge and timely intervention, yellow leaves don’t have to mark the beginning of the end; in fact, they can be the first step toward bringing your plant back to its full health and vitality.
Every healthy cannabis plant will eventually experience some leaf aging, especially towards the end of the flowering cycle when lower leaves naturally yellow and fall off. However, yellowing can also be caused by various issues such as nutrient deficiencies, pH imbalances, water stress, pests, light problems, or environmental factors. The key is to stay observant, analyze the signs carefully, and make the necessary adjustments before the problem escalates. Addressing issues like overwatering, a lack of nitrogen, or light stress promptly can prevent the plant from going into a downward spiral that impacts both its growth and overall yield.
The Importance of Early Detection and Action
When you spot yellowing leaves, it’s important to act fast. The sooner you identify the cause, the faster you can treat it, and the better your chances of recovering your plant. As leaves are vital to photosynthesis and nutrient uptake, a plant under stress may stop growing optimally, affecting its yield, potency, and overall health. If left unaddressed, minor issues can lead to significant damage potentially impacting the entire plant.
For example, a nitrogen deficiency in the vegetative stage can cause older leaves to yellow and eventually die off, which if not corrected, will stunt the plant’s growth. Likewise, a pH imbalance can lock out critical nutrients, making them unavailable to the roots even when they are present in the soil or water. Yellowing might also be a sign of environmental stress, such as high heat or too much direct light, which can cause burns and dehydration. In these cases, catching the issue early allows you to make adjustments and give your plant a fighting chance to recover.
Consistent Care is Key to Prevention
The most effective way to deal with yellow cannabis leaves is through prevention. Establishing a consistent care routine helps reduce the likelihood of the issues that cause yellowing in the first place. This includes maintaining the right pH levels, ensuring your plant receives the proper nutrients, and adjusting your watering schedule based on the plant’s needs. Additionally, being vigilant about environmental factors such as temperature, humidity, and airflow can help prevent stress-related yellowing. Cannabis plants thrive in stable environments where they are given the right conditions to grow and flourish.
One of the best things you can do as a grower is to monitor your plants regularly. Even small changes in color, shape, or texture can indicate an underlying issue that needs attention. Regularly inspect your plants for pests, check the pH and nutrient levels, and watch for any signs of water stress. These small actions can help you catch problems before they escalate, keeping your plants healthy and green throughout their lifecycle.
Stay Educated and Adaptable
Cannabis cultivation is an ongoing learning process, and each plant is unique. As you gain more experience, you’ll become better at recognizing the subtle signs of stress and understanding how to address them. Keep an eye on your plant’s behavior and learn how it reacts to various conditions. Try different nutrient mixes, adjust environmental variables, and see how your plants respond. Experimentation is part of the fun, and the knowledge you gain will help you become a more skilled and confident grower.
There will always be challenges, but the key to overcoming them is to stay patient, observant, and proactive. Every grower faces challenges with yellowing leaves or other issues — even the most seasoned experts. It’s how you respond that makes the difference. By continuously learning, adjusting, and improving your techniques, you’ll not only correct yellowing but also optimize conditions for bigger, healthier, and more robust plants.
Conclusion
Yellow cannabis leaves aren’t the end of the road, but rather a valuable learning opportunity. They are your plant’s way of signaling that something needs attention, a wake-up call for you to step in and make adjustments. By diagnosing the problem early, applying the right fixes, and taking proactive steps to maintain healthy growing conditions, you can reverse the yellowing and bring your plant back to its full potential.
As a grower, consistency and observation are your best tools. Stay attentive to your plants’ needs, correct issues as they arise, and don’t be afraid to experiment and adjust. Over time, your green beauties will reward your efforts with stronger growth, better yields, and vibrant, healthy leaves and you’ll gain the confidence to tackle even the trickiest of problems with ease.
In the end, growing cannabis is a journey, not a destination. Every challenge yellow leaves included offers a lesson. Keep learning, stay curious, and your plants will thank you with lush, vibrant, and bountiful harvests!
FAQ
What is the most common cause of yellow cannabis leaves?
Overwatering and nitrogen deficiency are among the top causes, especially for beginner growers.
Can yellow leaves turn green again?
If caught early, yes! Especially in cases of nutrient deficiency or pH imbalance.
How often should I water my cannabis plant?
Only when the top inch of soil is dry. This varies based on pot size, temp, and humidity.
What’s the best nutrient ratio for cannabis?
It changes with the growth stage high nitrogen for veg, high phosphorus and potassium for bloom.
Do yellow leaves always mean the plant is dying?
Not always. It’s often reversible if diagnosed quickly. Just don’t ignore the warning signs.
