
Jan
Beginner, Beginner's Guide to Growing Marijuana
What Is Light Burn in Cannabis Plants? Signs, Fixes & Prevention (2026)
Water. Nutrients. Light. These are all the essentials all plants need, including the cannabis plant.
As a cultivator, especially one who’s just starting out, it can be tempting to provide more than what your crops need, including light. But too much of a good thing can be bad, including light. Too much light, in particular, can lead to a condition known as light burn.
But what exactly is cannabis light burn and how can you avoid it?
Why Do Plants Need Light?
But before delving into the issue of light burn, it is worthwhile to understand how important light is to cannabis.
The plant is classified as an autotroph which essentially means that it is a life form capable of producing its own food by using energy from light sources, like the sun.
This process is called photosynthesis. Practically all plants, including the cannabis plant, produce their food through this process. Photosynthesis starts when a plant absorbs carbon dioxide from the air. Plants do this through the holes in their various parts, including the leaves, stems, and roots.
Under a light source, a plant breaks down water and carbon dioxide to convert these into oxygen and a type of sugar known as glucose. Once CO2 and water have been broken down into sugar and oxygen, a plant’s chloroplasts will break down the sugar further so it can be readily used as fuel. Oxygen, on the other hand, is released back into the air.
Without adequate light, photosynthesis decelerates. Even if a plant has all the necessary ingredients to create energy, the whole process is stymied without enough light. To counter this in an indoor grow space, cannabis cultivators use grow lights, ensuring that their marijuana plants have plenty of light for photosynthesis.
The Cannabis Light Cycle
But aside from aiding in photosynthesis, light is also crucial for cannabis plants for another important reason: proper use and manipulation of light can increase yield and bud quality.
The cannabis plant is classified as a photosensitive plant. Essentially, what that means is that the amount of light exposure it gets produces a specific response. Additionally, the type of wavelength a light source provides during a particular growth stage can affect the marijuana plant.
If you are just beginning to cultivate cannabis, one of the key concepts that you need to learn and master is how to use both light and darkness at specific stages of growth to optimize plant health and increase yield. This is particularly important before and during the start of the flowering stage.
Lighting and the cannabis growth stages
The cannabis growth stage is divided into four parts: germination, seedling, vegetative, and flowering stages. If you are cultivating weed indoors, it is your job to use the appropriate grow light and light intensity.
- Germination stage
The germination stage starts from the day your cannabis seeds are germinated and typically lasts from around five to 10 days.
During this stage, cannabis seeds are placed indoors and should receive a huge amount of light. On average, they should get 16 hours of light and eight hours of darkness. Although your marijuana seeds do not rely heavily on lighting, it is still important to choose the right light spectrum. Most growers prefer using red-enrich light during this growth stage.
- Seedling stage
The seedling stage is the time when your cannabis seeds build the foundation for their growth. What you provide your plants during this stage will have a long-term effect on their development.
During the seedling stage, your young cannabis plants require as much as 18 hours of light and 6 hours of darkness. This light scheme is designed to mimic the hours of light during summer. It is highly recommended to use a LED grow light with a blue light spectrum to facilitate the development of healthy leaves.
- Vegetative stage
The vegetative stage is the time when you can see rapid growth from your marijuana plants. At this point, your crops will need 18 hours of light and six hours of darkness.
There are some cultivators who prefer to provide their plants with 24-hour lighting. But before you give this light scheme a try, be warned that doing so can lead to nutrient deficiencies. Worse, giving your plants light all day long can adversely affect them once they get to the last phase of the flowering stage.
Just as light is important for cannabis, so is darkness. The hours of darkness allow your plants to move around glucose and other nutrients where they are needed.
- Flowering stage
The flowering stage is the last and most-awaited growth stage of weed plants. And as such, you need to pay attention to a few important things, including lighting. At this stage, you will need to provide your plants with 12 hours of light and darkness.
What is Cannabis Light Burn?
Cannabis light burn is a condition where the leaves and other parts of the affected plants are burnt due to the close proximity of LED lights. The condition affects mostly indoor cannabis plants that rely heavily on grow lights as their source of light.
Technically, a light burn does not occur because it is getting too much light. A light burn or light stress occurs when a cultivator fails to find the right balance between light, nutrients, water, and carbon dioxide.
Putting your plants close to their grow lights does not necessarily lead to a light burn. The problem arises when you fail to make the necessary adjustments.
Aside from light, nutrients, water, and CO2, another factor that comes into play is excessive heat emitted by grow lights. Heat can literally burn a cannabis plant, especially when its grow light is placed too close to it.
Light burn can occur during the different stages of the cannabis growth cycle.
- Seedling stage
Seedlings are particularly vulnerable to light burns because of their fragile nature.
Without adequate light, a seedling may find it hard to develop and grow its first set of leaves. However, when it gets too much light, it can die.
This is why it is highly recommended that you use grow lights that don’t emit too much heat.
- Vegetative stage
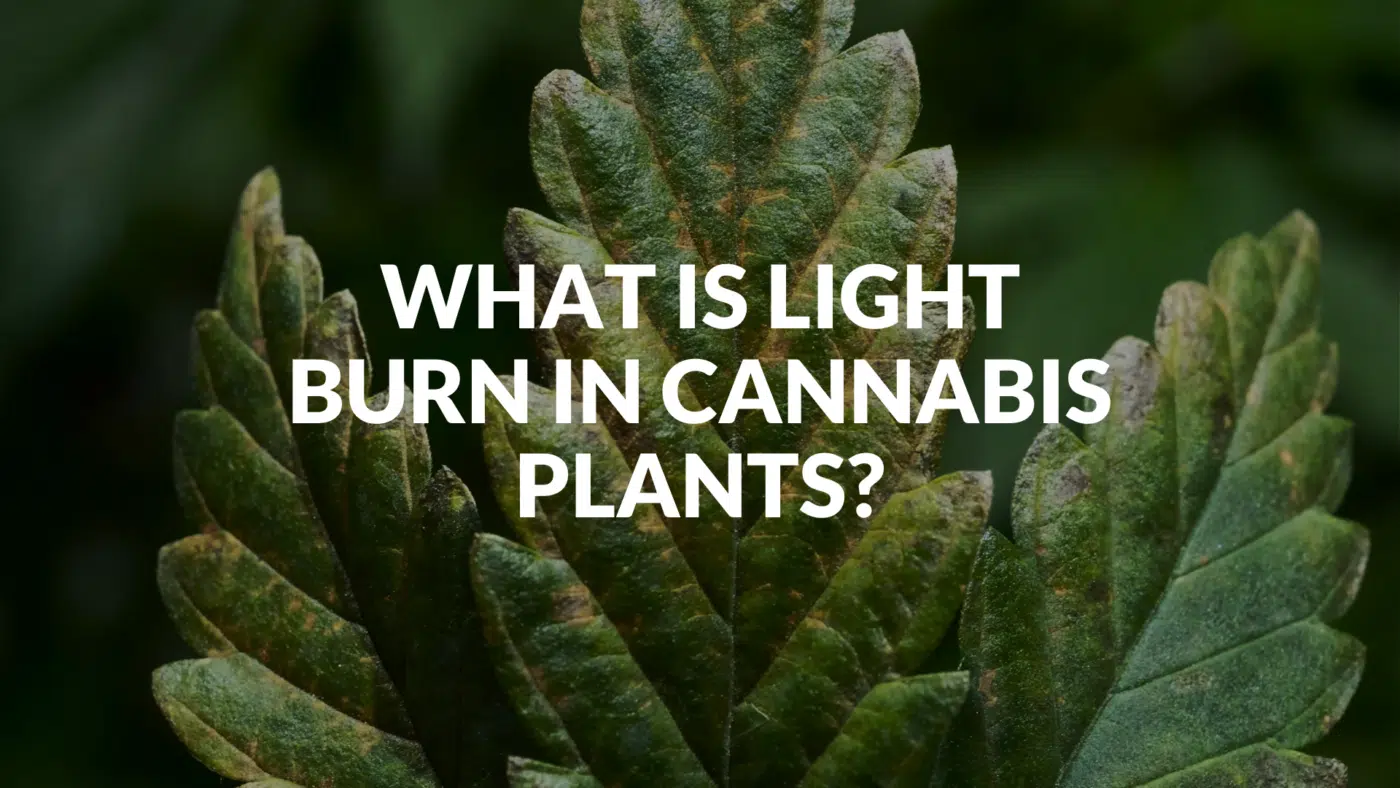
Exposure to excessive light and heat can damage your plants’ leaves. Light-burned marijuana plants display yellowing leaves while their veins remain green.
- Flowering stage
A light burn during the blooming phase can harm not just the leaves but also the buds.
In fact, one of the telltale signs of a light burn during this stage is buds with a white color. When this happens, the buds lose some of their fragrance and potency, rendering your previous efforts useless.
Signs of Light Burn
If you suspect that your crops have been light burned, here are three signs that can confirm your suspicions.
- Yellowing leaves
One clear sign that your plants are suffering from a light burn is yellowing leaves.
Yellowing leaves are a common symptom of a variety of conditions in cannabis, including nitrogen deficiency. However, light burned leaves are usually found in the topmost part of the affected plant. Furthermore, you will notice that the yellow leaves are quite difficult to remove.
If the discoloration of the leaves are caused by a nitrogen deficiency, the bottom leaves are the first ones to be affected. Additionally, these leaves fall off from the branches on their own or can be removed easily and without much resistance.
- Growth slowdown
One of the adverse side effects of light burns is that the affected weed plants lag behind in their growth.
As the leaves of the affected plants become discolored and shrivel due to low water content, they find it harder to photosynthesize. Essentially, this means that the weed plants are starved. In turn, this can result in stunted growth. If the light burn occurs during the early growth stages, the affected plants will find it hard to reach their true growth potential compared to the unaffected cannabis plants.
- Albino flowers
Another sure sign that your crops have been affected by a light burn is bleached or white flowers. To the untrained eye, white cannabis buds are a sight to behold, leaving one wondering which strain produces these flowers.
But the reality is that bleached flowers are the result of a light burn. The buds turn white due to excessive heat.
If you are wondering if you can smoke these bleached buds, the short answer is yes, but with a few caveats. For starters, the affected buds have a scent and taste that considerably pale in comparison with normal marijuana flowers. You can still smoke them but the familiar high and potency are likely gone. The main reason behind that is the degradation of the terpenes due to light stress.
Can seedlings succumb to light burn?
Yes, seedlings can suffer from a light burn, especially if you place LED grow lights too close to them and the light is too intense. Intense light can cause your seedlings to become fragile and have spindly stems when subjected to light stress for a prolonged period.
Light burn vs. heat stress
Anything excessive can damage cannabis plants, including light and heat. But between the two, too much heat is worse for your crops.
Excessive light can lead to light stress and can damage marijuana leaves and buds. But the thing is, if you act promptly, it is possible to turn things around.
But not with heat stress. Too much heat can literally burn your weed plants. When that happens, it can be particularly difficult to turn things around.
With light stress, you can still harvest and smoke the buds that did not suffer from cannabis light burn. All you have to do is follow the tips listed below. Sure, you might lose a few of the white marijuana buds but you can still harvest the unaffected flowers.
How to Fix a Cannabis Light Burn
Can your plants bounce back from a cannabis light burn? That depends on the severity of the light burn. But yes, it may still be possible for your crops to bounce back from cannabis light stress.
Of course, there are a few caveats. For one, your plants have a higher chance of recovering from a light burn if you have detected the issue before things spiral out of control. And second, you act fast to implement the necessary corrective measures. Here are a few things that you can do to fix a marijuana light burn problem.
First, you need to create more distance between your light burned plants and their grow lights. One approach you can use is to move the affected plants and grow lights farther from each other. Alternatively, you can remove a few bulbs from your grow lights to lessen light intensity.
If neither of these two options is impossible to do, your next alternative is to use a low-stress training technique for the plants affected by light burn. The plus side of this solution is that you can increase your yield.
In a nutshell, this training technique requires you to ensure the height uniformity of all the plant branches. Instead of allowing your plants to grow taller, you would want them to grow bushier by bending the stems to the side, usually with the use of an aid.
Finally, it would be helpful to the plants that succumbed to a light burn to have a lower grow room temperature. However, do not lower the temperature drastically. Instead, take things slowly while maintaining a consistent temperature in your grow room. This will give your marijuana plants enough time to adjust.
How to Prevent Light Burn
As with most things, prevention is always preferable to the cure, including marijuana light burn. But how exactly do you prevent light burn? Here are a few helpful things to bear in mind.
Consider the available space in your grow room
Your choice of grow light should depend in part on the available space in your grow room. Specifically, the vertical space inside. There is no point in investing in powerful grow lights if you have little space available. You will only risk your plants suffering from a light burn.
Find the optimal plant-light distance
The closer your plants are to their grow lights, the risk of light burn increases exponentially. This is why it is critical for you to find the optimal distance between your weed plants and their grow lights.
But how do you do that?
First, you need to consider which type of grow light you want to use in your indoor setup.
If you are using a 400-watt HPS or MH grow light, keep the distance between the light and your plant between a foot and a foot and a half. On the other hand, if you are using a 600-watt HPS or MH grow light, keep your plant and light at a slightly wider distance. If you are using 400-watt LED lights, keep your plants and lights about one and a half feet away from each other. For a 600 wat LED light, the optimal distance is slightly wider.
A lux meter is a good investment if you really want to dial in the best distance between your cannabis plants and their grow lights. Do take note that the lumens per square meter will vary depending on the growth stage of your crops. As your weed plants grow older, so should their distance away from their light source.
Adjust your parameters
Stronger lights can facilitate faster growth. However, stronger lights can also increase your plants’ metabolism. And if you aren’t careful, your plants can succumb to light burn.
If you want to experiment with stronger grow lights, adjust your feeding, watering, humidity, and temperature protocols. Additionally, try using supplemental CO2 so your plants won’t be damaged by too much light.
Too Much Light Is Bad
Light stress almost always happens in an indoor grow setup. At the end of the day, light burn isn’t just a matter of giving too much light to your crops. Other important factors come into play. As a grower, you need to find the optimal balance between a few things, especially lighting to prevent light burn on cannabis.
As you gain more experience as a grower, you can learn how to avoid common problems in the hobby, including light stress.
Light Burn at a Glance (2026 Quick Reference)
- What it looks like: bleaching or yellowing on the leaves and buds closest to the light, upward-curling (“canoeing”) leaf edges, and crispy tips while the leaf veins often stay green.
- First move: raise the light or turn down its dimmer to increase the distance from the canopy.
- LED distance (flowering): roughly 30–45 cm (12–18 inches) above the canopy for most mid-power boards — always check your light’s PPFD-at-height chart.
- HPS distance (flowering): further back, around 45–60 cm, because of the extra heat.
- Target intensity: about 600–900 µmol/m²/s PPFD in flower; only push toward 1,000+ if you are running supplemental CO².
Light Burn FAQ
Can a cannabis plant recover from light burn?
Yes — mild light burn usually recovers once you increase the distance or reduce intensity. The damaged leaves won’t turn green again, but new growth comes in healthy. Severe, prolonged burn can cost you yield, so act as soon as you spot it.
How far should my LED light be from cannabis plants?
For most mid-power LED grow lights, 30–45 cm (12–18 inches) above the canopy during flowering is a safe starting point; higher-output boards need more distance. The reliable method is to follow the PPFD-at-height chart your light’s manufacturer provides.
Is light burn the same as nutrient burn?
No. Nutrient burn starts at the leaf tips throughout the plant and is caused by overfeeding, while light burn concentrates on the top colas and leaves closest to the light. If only the highest growth is affected, suspect light, not nutrients.
Does light burn happen in veg or flower?
Both, but it is most common in flowering, when growers push intensity for bigger buds and plants stretch closer to the light. Check your canopy-to-light distance every few days as the plants grow.
